Assignment 4 Due Tuesday Apr 22, 11:00am ET
Fine-tuning a GPT2 with One Tiny Cloud Thread
FAQs
- Heads-up: Pretrain/fine-tune using a single CPU core can be time-consuming (a single run may be taking 40 minutes to 2 hours). So start early.
- For this assignment, recommended EC2 instance type is m5.large with a volume size is 100GB.
- Part 2 and Part 3 do NOT reuse the model trained in Part 1. Instead, follow the instructions to download a base GPT2 model using the HuggingFace Transformers API.
Overview
This assignment is for you to gain hands-on experience in LLM training/fine-tuning on AWS EC2. You will just need a single EC2 instance with a 100GB SSD volume. You will then develop two training applications using HuggingFace’s Transformers library:
- a “pretrain” program,
- and a “fine-tune” program,
to train/fine-tune a small, 124M-parameter GPT2 model.
You will also deploy your fine-tuned model using a Dockerized server and chat with your own custom GPT2 from a local computer, or anywhere on the Internet. You will also prepare a short report detailing your observations, experience, with links to a few demo videos that you will make at the end of this assignment.
This will be even more fun! 😎
Learning outcomes
The learning outcomes of this assignment are to:
- Write simple training applications using the Transformers library.
- Fine-tune a small language model with different fine-tuning datasets.
- Deploy a Docker container for model serving and inference.
- Deploy a minimal ChatGPT-like client to enable client-server communication.
Part 0: Environment setup
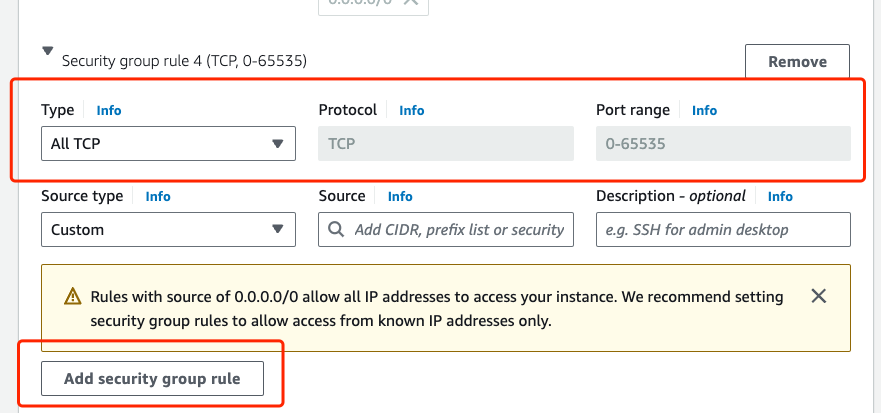
Like the previous assignments you will complete this assignment on AWS. Hopefully by now you have got yourself familiar with setting things up in AWS via Academy. See Assignment 0 about how to use AWS Academy to access AWS cloud resources. See Assignment 1 about how to change network settings to enable ALL TCP traffic.
In this assignment, you only need to create one EC2 VM instances of type m5.large. (You can use t3.large for this assignment; it’s just that m5.large provides a lightly better and more steady computing power than t3.large.) (Create five EC2 instances of the same You can name it with llm or anything you like.
I don’t recommend reusing your existing EC2 instances from A3, as those instances come with smaller, 50GB GP2 SSD storage. Fine-tuning is both storage-intensive and compute-intensive, so it’s best to configure your VM using a 100GB GP2 SSD volume to ensure you have enough storage space.
Change network settings by adding a new ALL TCP security group
You need to configure the Network settings of all EC2 instances. You can reuse the existing security group that you created for A3.
For a new EC2 instance, always run apt update before installing any dependencies.
$ sudo apt update
$ sudo apt install -y python3-pip
Install the following Python dependencies including Jupyter Notebook:
$ pip3 install notebook
$ pip3 install torch numpy transformers datasets tiktoken wandb tqdm 'accelerate>=0.26.0' ipywidgets
$ source .profile
You also need to install Docker. First, set up Docker’s apt repository:
$ sudo apt install ca-certificates curl
$ sudo install -m 0755 -d /etc/apt/keyrings
$ sudo curl -fsSL https://download.docker.com/linux/ubuntu/gpg -o /etc/apt/keyrings/docker.asc
$ sudo chmod a+r /etc/apt/keyrings/docker.asc

# Add the repository to Apt sources:
$ echo \
  "deb [arch=$(dpkg --print-architecture) signed-by=/etc/apt/keyrings/docker.asc] https://download.docker.com/linux/ubuntu \
  $(. /etc/os-release && echo "${UBUNTU_CODENAME:-$VERSION_CODENAME}") stable" | \
  sudo tee /etc/apt/sources.list.d/docker.list > /dev/null
$ sudo apt update
Next, install the Docker packages:
$ sudo apt install -y docker-ce docker-ce-cli containerd.io docker-buildx-plugin docker-compose-plugin
To verify that the Docker installation is successful, run:
$ sudo docker --version
$ sudo docker run hello-world
Note you need sudo permission to run docker commands.
Finally, download all code skeleton files and shell scripts at this link for Part 1-3.
Part 1: Pretrain a GPT2
Your job in this part is to implement a training process to “pretrain” a GPT2 with a very basic training dataset provided in the code skeleton file a4_part1_gpt2_pretrain_skeleton.ipynb.
Task 1: Your first task for this part is to write code for training setup and initialization.
Task 2: Your second task is to update the learning rate manually for each param_group in optimizer.param_groups.
Task 3: Your third task is to evaluate the model, record the best validation loss, and save a checkpoint file at eval_interval.
Task 4: Your fourth task is to perform forward and backward pass, calculate the average loss value, and prefetch next batch of training sample.
Task 5: Your last task is to run the optimization process.
Each training iteration runs for 1-1.4 seconds on average. So running 2000 iterations will require around 30-40 minutes to complete. You could change the max_iters to shorten or extend the training. With 1500-2000 iterations, the model should be able to answer basic question about GPT based on your predefined training dataset.
Document the training time and prompt test results in your report. See Deliverables for the requirement of a report.
Part 2: Fine-tune a GPT2 using a Q&A dataset
Your job for Part 2 is to implement a training process in a4_part2_finetune_skeleton.ipynb to “fine-tune” a base GPT2 with a dataset called alpaca-1k. This dataset contains 1,000 Q&A entries. The base GPT2 is not able to handle almost all of these Q&As at all. Our goal for Part 2 is to train a fine-tuned GPT2 so that it has some limited ability to handle basic or paraphrased questions similar to those in alpaca-1k. In reality, you’ll find, even after a few hours’ fine-tuning, your custom GPT2 may still struggle with many questions, but it should perform much better than the base GPT2. If you observe such improvement, you’ve successfully achieved the goal for Part 2.
According to the Scaling Laws, “language modeling performance improves smoothly as we increase the model size, dataset size, and amount of compute for training.” So, this seems like the best we can achieve with just half of an MB worth of dataset and a single CPU core — though that’s a bit of a stretch 😅.
You don’t have to download the dataset as the Transformers library will download it automatically for you.
There are three tasks for Part 2:
Task 1: In this task you will just fill the training cell by adding the following code:
- Step 1: Set the seed for reproducibility
- Step 2: Load model and tokenizer using the Transformer library API
- Step 3: Prepare the dataset (
dolo650/alpaca-1k) - Step 4: Set up trainer
- Step 5: Start the fine-tuning process
Your default fine-tuning process will run for 100 steps (set via max_steps). With 1000 Q&A entries, it will take around 1 hour and a half to 2 hours to complete 100 steps.
A commodity GPU would train much faster than this 🚀. Try it on a free NVIDIA T4 GPU in a Colab notebook and see how much speedup you achieve, though using Colab GPU is not required for this assignment.
Task 2: Your second task is to reduce the training dataset by explicitly limiting the fine-tuning range to the first N Q&A entries. This can be set in prepare_dataset(). This task is divided into two subtasks:
- Task 2.1: Configure
Ninprepare_dataset() - Task 2.2: Modify
output_dirin the configurations cell so that your next fine-tuning will not overwrite the existing fine-tuned model from previous runs.
Document the training time and the testing result by varying N in your report.
Task 3: Your third task is to implement a prompt testing program to prompt the fine-tuned model. You will need to add code to a4_part2_test_finetuned_skeleton.ipynb:
- Task 3.1: Load a model and a tokenizer
- Task 3.2: Write a test prompt that paraphrases a sample in your fine-tuning dataset and tokenize the input
- Task 3.3: Generate output tokens and decode it
Report the training times and prompt test results in your report. See Deliverables for the requirement of a report.
Part 3: Fine-tune a GPT2 using your own dataset
The most fun part: you will fine-tune a base GPT2 model using a dataset of your choice. You can pick any dataset you like. There is only one requirement:
The dataset you choose should not be too big. In case you use a large dataset, you need to write code to explicitly select a subset of samples to keep the fine-tuning time reasonable.
NOTE: Part 3 is open-ended, so you can do any types of customization in any part of your code.
Duplicate your .ipynb file from Part 2 and name it a4_part3_finetune_<dataset_name>.ipynb.
Part 3 includes three required tasks and one optional task (for extra credit 🌟):
Task 1: Customize the tokenize_function in prepare_dataset(), as different datasets have different formats.
Task 2: Run the fine-tuning process and document your training time and prompt test results in the report.
Task 3: In this task, you will launch a containerized text generation inference server that hosts your fine-tuned model and interact with it through a Chatbot web interface.
Containerize a Python server for text generation inference. The Docker container is from ghcr.io/huggingface/text-generation-inference. A shell script named launch_gpt2.sh is provided to help you provision and launch a text-generation-inference Docker container on your EC2 VM instance. You will need to change line 3 of the script with the path to your own model directory:
model_path=$PWD/<YOUR_FINE_TUNED_MODEL_DIR> # Path to your model directory
Before running the Docker container, you need to grant execution permission to launch_gpt2.sh:
$ chmod +x launch_gpt2.sh
To deploy and run the Docker container:
$ ./launch_gpt2.sh
If this is the first time you run the script, it will first download the Docker container from DockerHub and then start the server–it takes several minutes to fully download the container image. You will see a Docker pull log while it’s downloading the container:
ubuntu@ip-170-30-11-11:~/a4$ ./launch_gpt2.sh
Unable to find image 'ghcr.io/huggingface/text-generation-inference:3.1.0' locally
3.1.0: Pulling from huggingface/text-generation-inference
aece8493d397: Pull complete
45f7ea5367fe: Pull complete
3d97a47c3c73: Pull complete
 ... # Omitted a bunch of Pull completes in the middle...
8a050b7ef1d1: Pull complete
7975bedcb14f: Pull complete
3c346d5d6340: Pull complete
Digest: sha256:da2982809d778a3e81e2d459c4aa516c50f6add2d7dcbf1180fc973fd6ecf379
Status: Downloaded newer image for ghcr.io/huggingface/text-generation-inference:3.1.0
After the container is downloaded, it takes about a minute to fully start the server. Wait until you see a Connected message shown as the following:
2025-03-28T02:16:12.905714Z INFO text_generation_router::server: router/src/server.rs:2423: Connected
Verify that the text generation inference server container image has been downloaded by running:
ubuntu@ip-170-30-11-11:~/a4$ sudo docker images
REPOSITORY                                      TAG       IMAGE ID       CREATED       SIZE
ghcr.io/huggingface/text-generation-inference   3.1.0     6724f1647f1b   8 weeks ago   12.2GB
A prompt.sh script is provided for communication with the server. Again, make sure to give it execution permission by running chmod +x prompt.sh.
To run the script:
$ ./prompt.sh "<YOUR_PROMPT_TEXT>" <MAX_OUTPUT_TOKEN_LEN>
Replace <YOUR_PROMPT_TEXT> and <MAX_OUTPUT_TOKEN_LEN> with your prompt test. An example script command looks like the following:
$ ./prompt.sh "Provide a list of three random colors." 100
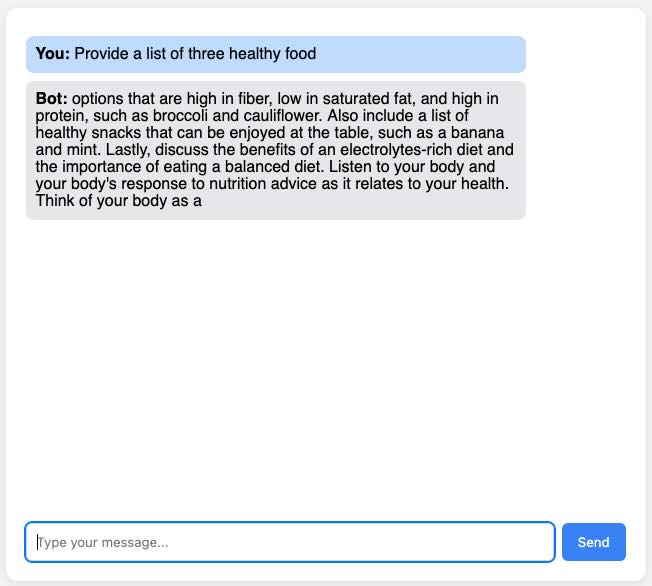
If you can see a returned output that looks like the output tokens generated by your model, congratulations 🎉 – your minimalist chatbot service is up and running!
NOTE: If you run
prompt.shfrom a local computer, you will need to replace thelocalhostwith the public IPv4 DNS address of your EC2 instance.
Having a good interface frontend is part of a good data system design. Now that you have a Dockerized backend server running, next, you will deploy a simple frontend for your own model.
To do so, download the HTML file at this link to a local computer (NOT your EC2 instance). This HTML is your minimal ChatGPT-style client (a minimalist version), which connects to your Dockerized fine-tuned model running on your EC2.
NOTE: Replace
<EC2_public_IPv4_DNS_address>in line 81 with your actual EC2 IPv4 DNS address.
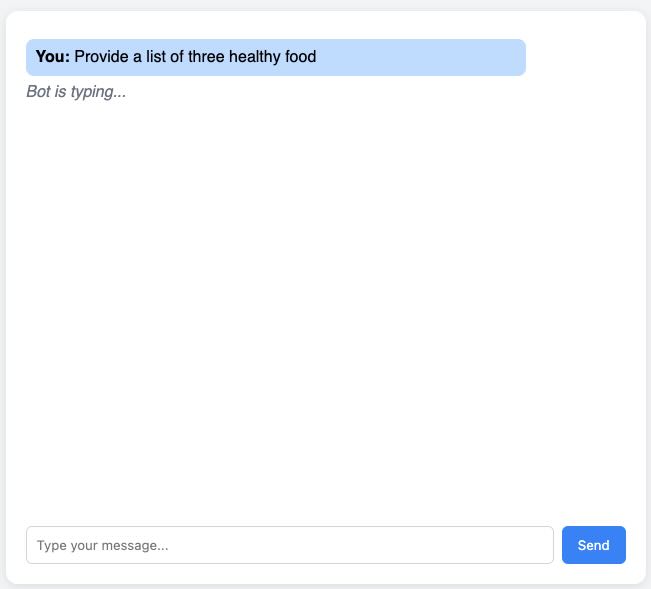
Open it in a browser, you can now chat with your Dockerized chatbot.
What you need to do for Task 3:
Record a short video demo that captures the following process:
- Launching your Dockerized backend model server on EC2,
- Opening your minimal ChatGPT-style client webpage in your browser,
- Having a few rounds of conversation with your chatbot.
Task 4 (extra credit 🌟): This optional task encourages you to do something interesting! In this task, you will do some vibe coding to design / create / renovate a better client interface. This interface could be a complete redesign based on the HTML that I provided, or an enhancement with additional functionality–such as configuring the output token sequence length, temperature or uploading a JSON file as a prompt. You’re also welcome to use more advanced frontend tools like React, Node.js, and Tailwind.
Again, record a short video demo that captures the following process:
- Launching your Dockerized backend model server on EC2,
- Opening your advanced client webpage in your browser,
- Having a few rounds of interactions with your chatbot.
Deliverables
Finally, you should submit a tar.gz file to Canvas, which follows the naming convention of LastName_FirstName_ComputingID_A4.tar.gz. The submitted file should include:
- a
.ipynbfile containing the code of all tasks for Part 1: pretraining a GPT2 (filename:LastName_FirstName_ComputingID_A4_Part1.ipynb), - a
.ipynbfile containing the code of Task 1-2 for Part 2: fine-tuning a GPT2 usingdolo650/alpaka_1kdataset (filename:LastName_FirstName_ComputingID_A4_Part2_FineTuning.ipynb), - a
.ipynbfile containing the code of Task 3 for Part 2: prompt testing your fine-tuned model (filename:LastName_FirstName_ComputingID_A4_Part2_Testing.ipynb), - two
.ipynbfiles of Part 3: one for the custom dataset fine-tuning code (filename:LastName_FirstName_ComputingID_A4_Part3_FineTuning_DatasetName.ipynband the other for the testing code (filename:LastName_FirstName_ComputingID_A4_Part3_Testing_DatasetName.ipynb), - a short
PDFreport including major training results and URL(s) of your video recording(s) (filename:LastName_FirstName_ComputingID_A4_report.pdf), - (extra credit) a folder containing your implementation of the enhanced chatbot client interface.
The skeleton we supplied is well documented with clearly marked TODOs to tell you where you should add your own code. Your code should be well commented as well. The code comment should include Part number and Task number and include a brief description of the implementation. Comments are worth some percentage of your grade for the assignment, the GTA will be looking at your code as well as the comments (comments serve as a README for a particular task).
In addition to including comments, make sure to keep all cell outputs saved in your submitted .ipynb file for grading.
For the PDF report, in addition to the training time and prompt testing results for Part 1, Part 2, and Part 3, you should also include the link to a viewable video recording for Part 3 (and optionally, a separate link to a video recording for Part 3 Task 4). You can use Zoom to make the video and share the Zoom recording via URL. Or, alternatively, you can upload your video files to Google Drive and share the viewable Google Drive video file via URL. If you use Google Drive, make sure to test the link in incognito mode to ensure the video is playable. DO NOT include any video files to your submitted tar.gz file.
You’re more than welcome to share anything that you’ve learned from this assignment, from observations and insights that you learned, new skills that you picked up, to something that you would have liked to try but did not get a chance to, just to list a few.